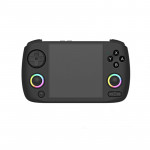
Anbernic RG353 Series Setup Guide (RG353V, RG353M, RG353P, RG353VS, RG353PS)
Anbernic RG353 Series Setup Guide (RG353V, RG353M, RG353P, RG353VS, RG353PS)
Recommended Accessories
- MicroSD Card: You would be fine with 128GB or 256GB, given the platforms on which this runs.
- MicroSD Card Reader: UGREEN SD Card Reader
- HDMI Out: UGREEN HDMI to Mini HDMI Cable (An HDMI cable will still be required).
- Charger: UGREEN 65W Charger(Use the USB-A port to charge.)
Initial Setup Guide
In this tutorial, we'll install ArkOS, a customized firmware for the Anbernic RG353 Series. ArkOS has a strong community and is a far better operating system to use than stock. For them, it's the best operating system we have.
Before we begin, you must always have a high-quality, branded SD card and reader. The device's stock SD card should be thrown away rather than used. This also applies to the ROM SD card; if you are here after purchasing the device, discard it, and if you are here before, do not purchase it. In addition, these SD cards are low-quality and unbranded, which makes them more likely to malfunction. The ROMS have numerous problems and are of poor quality. One major issue is that progress cannot be saved, which enrages Pokemon enthusiasts. If you don't believe me, look up Pokemon saves on Reddit. I'll also teach you how to locate ROMs in the most subtle way possible. Whether you want to use a single SD card or two will determine the quality of the SD card and reader. The Samsung Evo 128GB is the most excellent choice if you only want one SD card. If you're using two cards, a 64GB SanDisk and that same card for ROMs make a fantastic combination. It's up to you whether you want one or two SD cards; if you're on a tight budget, use one.
Your BIOS library and ROM are the final things you need. You can download a ROM pack called the Tiny Best Set if all you want is an extensive list of games, which you can then choose which ones to play. Although I cannot give the link to this package, I demonstrate it in the video above and in this video that serves as an essential guide. An extensive, carefully chosen list of BIOS files and ROMs is included with this bundle. For convenience, you should download the following filenames on a 128GB card: tiny-best-set-go-games.zip + tiny-best-set-go-expansion-64-games.zip + tiny-best-set-go-expansion-128-games.zip.Don't worry about that too much; we can obtain the artwork by scraping it in ArkOS. After extracting all those zip files to one location, you should have several BIOS and ROM folders. You will be responsible for finding other venues using Google, Reddit, or other resources if you desire more than what is offered in this package.
Software
All right, your ROMS and BIOS files, along with your SD card and SD card reader, are ready to use. Let's go on.
The two pieces of software that we require are Rufus and 7-Zip. Visit the Rufus website, where you can download the portable Rufus tool. This will assist us in formatting our SD card as FAT32, mainly if it is more significant than 32GB. To prevent problems, use Rufus instead. Download the exe from the 7-Zip website corresponding to your Windows version, most likely the 64-bit version.
Additionally, let's visit the ArkOS Wiki. If you have the RG353M, RG353P, or RG353PS, we'll grab the RG353M image; if not, we'll hold the RG353V or RG353VS image. Get it via the Mega link or GDrive. After downloading it, extract the zip file using 7-Zip.
Formatting the SD card
Connect your SD card to the computer using the SD card reader. The 64GB card for two users is the operating system card, which we will now format as FAT32. You can also use your single SD card using the one-card technique.
Please verify that the device indicated in Rufus is the SD card you connected; it should be the same size as the disk. Click Select on the right, then pick the image file by navigating to the folder you extracted from the ArkOS package. Click Start and leave everything else as it is. Many individuals try to flash the downloaded file before removing it, so be sure you're choosing the image file you extracted.
From now on, when you place the image on the SD card, you will see Windows pop-ups stating that the card is not formatted, that there are partition issues, or something similar. Ignore all that; if you format the card after all of this, you will have to start over. Windows doesn't know how to manage a FAT32 card.
After Rufus is finished, you can safely eject the card using the taskbar. Then, while your device is turned off, you want to insert it into the TF1 slot. Next, turn the gadget on. Don't do anything and let it do its thing; it will reboot twice.
You will know you are ready when you see the EmulationStation menu.
We must now upload our BIOS and ROMS files. Press Start to turn off the device, then select Quit. The following stage will determine whether you're using the one-card approach or the two-card method. Since I'm going to demonstrate how to get a second card to function, the one-card technique can skip this step and go straight to the section on both methods.
Two-Card Method Only
Connect your second SD card to your computer using the SD card reader. Please verify that the device indicated in Rufus is the SD card you connected; it should be the same size as the disk. Now select Nonbootable under boot selection. I left mine as the drive size, which is 128GB, but you may change it to anything you choose. Next, verify that the file system is FAT32 or Large FAT32 by looking toward the bottom. Click Start. To get started, click "yes" to all of the cautions that may appear regarding partitions, data, etc.
Your second SD card will be formatted as FAT32 and should be speedy. When finished, safely extract the card and put it into slot TF2 with the device turned off. After turning the device on, select the Options tab Advanced and SWITCH TO SD2 FOR ROMS. After that, the folder structures for the second SD card are set up, and we are ready to go. Switch the gadget off.
Both Methods
If you have a single or dual card, plug your SD card back into your computer. If you use the two-card technique, the second SD card for ROMS should be 128GB or more significant. If using the single card method, you should notice an EASYROMS partition in File Explorer; navigate to that. Otherwise, if this is your second SD card labeled to whatever you previously configured in Rufus, all you'll see are ROM folders. If not, assign a letter to that partition by opening Windows Disk Management.
At this point, these are the platform folders where you can store your BIOS and ROMS. You should now take your BIOS and ROMS files from the Tiny Best Set collection that we previously obtained and place them in the appropriate location. The folder names don't match many, so you must move the ROM files from the Tiny Best Set folders to the proper spot on the EASYROMS partition. Check the emulator page on the ArkOS wiki if you need help identifying which platform is which. It will also tell you which file formats and BIOS are required for each device.
After transferring all that, safely detach your card and replace it with the device turned off. When using two cards, the operating system card must always be in slot TF1 for the computer to boot up correctly, and your games card should be in slot two.
All your games should be installed and operational when you turn the device on.
Box Art
However, let's post some artwork here. In the Options, Advanced section, turn on your WiFi. After being sent back, you will return to the exact location and select WiFi. Push Start when you've finished configuring your WiFi and returned to the main EmulationStation menu containing all the systems. Proceed to Scraper. You should now create an account on Screenscraper's website, then return here and complete the necessary information. The remaining choices are up to me; I'll turn off ratings and videos as I don't need or want them. Box 2D is a source of pictures for the actual box art. When you're prepared, click Scrape Now. You can choose which systems to scrape or complete the process. When you're ready, click "Start," and I'll take care of the rest.
Retro Achievements
Enabling Retro Achievements is another thing to demonstrate. For those who don't know, old games include achievements, which is fantastic. Thus, we want that functionality. We'll need your login and password, so if you still need one, go to the RetroAchievements website and create one. When you select Retroarch from the device's main menu, two instances of RetroArch will appear. The steps are the same, and we must log in on both. Launch one, select Settings, Achievements, Enable Achievements, and then fill in each field with your username and password. If hardcore mode is enabled, turn it off. Next, return to the main RetroArch menu, select Configuration, and then select Save Configuration. After that, exit RetroArch. For Retroarch32, repeat these instructions once more.
Tweaks
Regarding RetroArch, I should be aware of a few of the parameters. For some reason, Fast Forward isn't mapped, so let's go to Settings, Input, and Hotkeys, choose Fast Forward Toggle, and set it to R2. Additionally, let's set the display FPS to Y. Because SELECT is our hotkey button; we must press SELECT + these Hotkeys to activate these features. To avoid pressing Start+Select twice to end a game, back out one menu and disable Confirm Quit. Let's go back out and start saving now. Enable Auto Save State if you want ArkOs to save the state when you quit, as it does not currently.
Similarly, when you load a game, the save state is not loaded automatically; if you like that, you can enable it. I desire both. To return to the main RetroArch menu, back out twice. Then select Configuration and Save Current Configuration. After quitting RetroArch, follow these identical procedures for the other version of RetroArch.
Themes
Select Start from ArkOs' main menu to switch your theme, then UI Settings. A selection of themes will appear. Visit the Arkos Wiki for information on how to add more.
Postmaster
Visit my guide at https://joeysretrohandhelds.com/guides/portmaster-guide-for-retro-handhelds/ to learn more.
Remote Services
Go to Options and Enable Remote Services to load your games from a distance. Next, enter that IP address in any web browser connected to a local network. Lowercase ark is the default for both the username and the password. The files on the ROM SD card can now be uploaded, downloaded, deleted, and altered in any way you choose. This is incredibly helpful for adding games to your device from a distance.
Updating ArkOS
Finally, how is ArkOS updated? It's straightforward. After selecting Options, you scroll down to Update. When you click it, a warning about the script not ending will appear; click OK, and then you must write OK. After that, put it down and let it update.
Now, start playing games and enjoy yourself. That's all you need to accomplish for everyday use, which was the guide's primary focus. Once you're up and going, everything is at your discretion.


