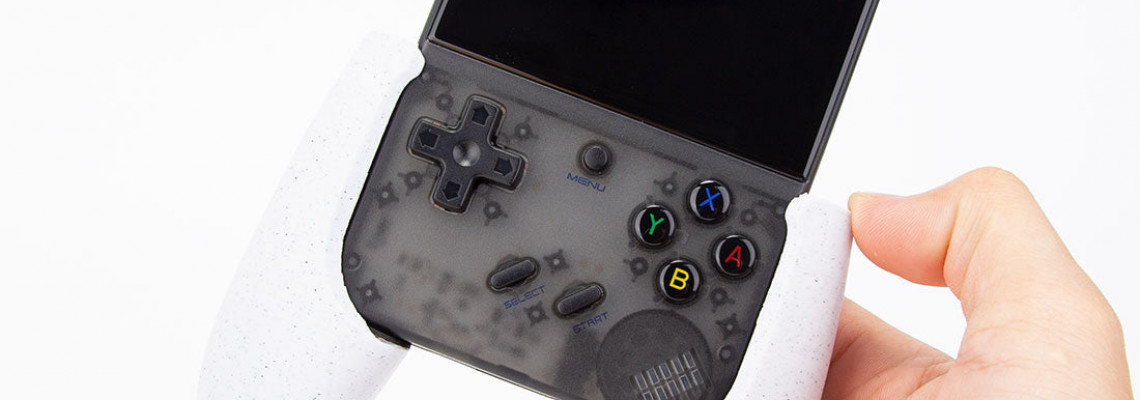
Anbernic RG405M/RG405V Setup Guide

Anbernic RG505 Setup Guide
Recommended Accessories
- MicroSD Card: 128GB or 256GB
- MicroSD Card Reader: UGREEN SD Card Reader
- Charger: UGREEN 65W Charger
Initial Setup Guide
- Your SD card can be ready in advance. To receive everything you need before receiving your gadget, follow the instructions on this page.
Recommended Settings
- Play Store: Log in to the Play Store and do any app updates.
Recommended Emulators
To keep some of these emulators, like Vita3K and RetroArch, current, you should use Obtainium.
RetroArch – PS1 & Under – Nightly (RetroArch_aarch64.apk)
It would help if you used the Nightly build, not the one from the Google Play Store, for RetroArch. RetroArch will be your go-to emulator for anything under and including the Sony PlayStation 1.
M64Plus FZ Pro – Nintendo 64
Regretfully, many games on RetroArch for the Nintendo 64 are broken on Android. Unfortunately, there is no other way to activate Retro Achievements. Some titles, like Super Mario 64 and Ocarina of Time, function flawlessly, but the majority will have several texture problems and more (Mario Golf, Pokemon Snap, etc.).
The premium version of M64Plus FZ Pro is preferable to the free one, and you should use it from the Google Play Store.
PPSSPP – Sony PlayStation Portable
The Google Play Store's PPSSPP is the most excellent Android emulator for simulating the Sony PlayStation Portable. If you wish to help the developer, you must purchase the version; otherwise, it makes no difference.
Dolphin – Nintendo GameCube & Wii – Beta
Dolphin and the Google Play Store's beta version are the best Android emulators for the Nintendo GameCube and Wii. If you enable or enroll in the beta version on the Play Store page, you will receive the most recent version of the emulator, which corresponds to the development version on their website.
NetherSX2 – Sony PlayStation 2 – Current
The most up-to-date and optimal version for emulating the Sony PlayStation 2 is NetherSX2-Current.
Recommended Frontends
- Daijisho
- EmulationStation
Teardown – RG405M
Custom Firmware Options
The stock firmware we set up above can be replaced with custom firmware. However, since the custom firmware below is a brand-new operating system, it will erase all of your data from your device.
GammaOS
What is GammaOS?
GammaOS is now fully available for your Anbernic RG405, and in this video, I'll walk you through installing it.
Let's first explain GammaOS (https://github.com/TheGammaSqueeze/GammaOS) to determine whether you want it. GammaOS, currently available on the RG405V, was the required firmware for the Anbernic RG405M for those familiar with it.
What do you get, then? This is predicated on a Lineage OS 19.1 build, which is jargon for an improved version of Android 12 that improves performance. Installing the Lite version, which lacks the Google Play Store, is an option; nevertheless, I strongly advise using the full version from the Play Store.
- Daijisho is a launcher for a few systems that come pre-configured with RetroArch; naturally, it excludes roms and bios files.
- Quick setting tiles have been included for performance modes, including button layout changes, fan control, stick sensitivity, inverting the analog axis, switching between the left analog input and the Dpad, and quick setting tiles.
- Adguard ad blocking is automatically enabled for those who visit malicious websites.
- The main idea is that it's a much better operating system, and your battery life and performance will greatly improve. The display has been set to 60 Hz to prevent any oddities, and there are many more features here.
Preparation
This next step can be skipped if you're opening the RG405 for the first time. However, if you've been using your RG405 for a while and have saved files, ROMS, BIOS files, and other files already, you should back them up somewhere else or, if you have an SD card, onto it. Since this is a completely new setup, everything on your RG405 will be erased during this operation; therefore, you must back up everything. Your internal storage, retroarch, saves, and states folder contains the RetroArch saves and states. Other emulators have different backup methods.
Once you've completed all of that, we're ready to begin. Please remove any SD cards you may have, as leaving them in could cause problems. I'll demonstrate the procedures for Windows; if you have a Mac or another device, follow the instructions in the aforementioned Github link.
Last but not least, before we start, make sure your battery is completely charged to avoid calibration problems and to prevent the planet from being blown up if it dies during any flashing.
Setup
If you're a Windows user, install the Universal ADB Driver (https://github.com/K3V1991/ADB-and-FastbootPlusPlus/releases). Instead of choosing the portable version, you can choose the EXE version. As you install, check the boxes for "Create Desktop Shortcut" and "Add to System Path Environment." On the last page, tick the box for "install Universal ADB driver." A command prompt will appear; press any key to dismiss it, then exit the prompt window and restart your computer.
Install the Unisoc Drivers by clicking on Link #2 (https://github.com/TheGammaSqueeze/GammaOS/releases/download/GammaOS_v1_RG405M/UnisocDrivers.zip). After extracting the zip file, run the DPInst64.exe application in the folder that corresponds to your Windows version. Users of Windows 11 can utilize Windows 10.
Enable USB Debugging
Now switch on your RG405 and proceed to activate USB Debugging. To view "Congratulations, you are now a developer," navigate to Settings and About, then press on the Build Number seven times.
Return to System and select Developer settings. Please scroll down to USB debugging and turn it on.
Now that your PC is powered on attach your RG405 to it with a USB cable. Select and permit USB debugging at all times. Launch Windows' command prompt and type the following command: Bootloader adb reboot
The text fast boot mode should appear on the screen next to the Anbernic logo once your RG405 has rebooted.
Fastboot Gadget Connect
On your computer, navigate to Link #3 (https://thegammasqueeze.github.io/subut-rehost/) in the description. It is crucial that you open it on Google Chrome. After selecting "connect," select "fastboot gadget" and "connect." Next, select "unlock."
The gadget will alert you that user data may be erased. OTHER THAN THE HOME/BACK BUTTON, DO NOT PUSH ANYTHING. That button is located in the center of the gadget.
If it says info: user cancelled after you unintentionally pushed something else, simply close the browser, open it again, click Connect, connect, and unlock once more. This time, press the center home/back button.
If you wait for it to finish, you will notice the unlock bootloader succeeds. The Google Chrome window should be fully closed.
Fastboot
Enter fastboot reboot fastboot in the command prompt window.
Make sure the screen indicates "fast boot" before we proceed. You should be booted into fast boot mode.
Grab the newest release.
Visit Link #4 (https://github.com/TheGammaSqueeze/GammaOS/releases) right now. We are now using version 1.5.1, but a future version might be available. Go ahead and purchase the RG405's Lite or regular edition. As previously stated, I highly recommend the full version and reserve the Lite edition for more experienced users.
Use 7-zip, which you can download from 7-zip.org, to extract the zip file to a separate folder. Then, launch the FlashPartitions.bat script to begin flashing the firmware, which may take up to ten minutes. It will close after 60 seconds after it is done.
After that, launch the EraseUserData.bat script to perform a factory reset for GammaOS on your device. This could take ten minutes. When it is finished, press any key to proceed.
After everything is finished, press the power button once to restart your RG405 device.
Before booting into the firmware for the first time, it will reboot and remain on the Anbernic logo for almost two minutes. It's normal, so don't worry about any issues or notifications.
You're done!
Congratulations! You are now on GammaOS. Let the device alone until the GammaOS upgrade notice disappears. Once you've completed all the standard instructions, it will boot directly into Daijisho as your front end with a few systems setups, just like when setting up an Android device.
You can add whatever emulators you choose, replace your ROMS and BIOS files, and insert your SD card again. Here is a guide for Android emulators if you need one. If you require assistance customizing that, the same goes for a Daijisho instruction.
Otherwise, have fun with your fantastic GammaOS gadget.


