Asus ROG Ally – Upgrade SSD Without Data Loss
Asus ROG Ally – Upgrade SSD Without Data Loss
Welcome back to Joey's Retro Handhelds, everyone. My name is Joey, and today, we will examine how to use cloning to replace the solid-state drive on your Asus ROG Ally with a larger one without erasing your data.
If you recently finished perfectly configuring your Ally but, like me, found a great deal on a larger drive and don't want to start over, you should do this. Here are some prerequisites to help you choose whether this video suits you. Naturally, a ROG ally is the first item you need, so let's take that off your list. Next, you'll need a new solid-state drive. You should purchase an M.2 2230 SSD unless you want to destroy your ROG Ally.
You can choose the size; however, I have a 2TB here. The Western Digital SN740 is currently the best one available. If you'd like, I'll include links to all of the products we discussed today in the description and information on where to purchase them. For example, I paid USD 130 for this 2TB shipped to Canada.
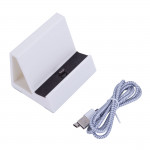
An M.2 enclosure is the next item you will want for this instruction. You can insert your brand-new drive into this and link it to the ROG Ally so we can use the software we'll discuss to clone it in a moment. Once more, the description includes a link to mine, which costs USD 18. Technically, this step is not required because, as far as I can tell, if you have the space, you can clone to any disk—an external hard drive, an SD card, or anything else. Go ahead and do it if you know how to do it. However, the most straightforward method was to grab this enclosure, which connects to my Ally. You don't need a USB hub or dock because it also supports USB-C to USB-C, but I would advise getting one as you'll want to have your Ally charged throughout this time. Using the original 512GB SSD as an external hard drive is the final significant advantage of having an enclosure like this. Keep it attached to your dock, load some games, and head out. Selling it is an option, but given its 512GB size, I don't think there is much of a market for something like this.
Remove your MicroSD card from the Ally to prevent problems I've seen. Just go ahead and do it; the entire process may give you headaches. For now, just set it aside.
Finally, you'll need a size 0 Phillips head screwdriver and something to open the case, either a credit card or a spudger. Everything you require is included in my iFixit kit.
Disabling Bitlocker is the only software-related action that is advised. Bitlocker primarily protects your data by encrypting all of your files and creating problems with cloning. Additionally, a gaming device doesn't need it. Now, I've read both sides of the argument. I've seen instances where Bitlocker is not present and instances where it is. I'm going to turn off Bitlocker since I prefer to be careful. Why change now when I've always done it this way and never experienced any problems? Go to the Start menu, type Bitlocker, and Manage Bitlocker should appear. If you have more than one drive, choose it and then click to disable Bitlocker under your C drive. Depending on the files and storage you've utilized, this process does take some time. Keep it plugged in; it might take several hours, although mine only took an hour. In the interim, we can continue work on the following step. After we've switched drives, you can choose whether or not to use Bitlocker. The procedure is the same as before, but you would choose to activate Bitlocker. You are operating at your own risk and beyond the purview of this article if you decide not to disable Bitlocker before cloning.
We can now do other things while Bitlocker decrypts. Now that we're talking about cloning software, we'll use a tool called Macrium Reflect. Although it's a strong tool with many imaging functions, we'll only be copying straight from the Ally onto the new drive for our needs. It offers a month-long free trial, more than enough time for our needs. Click Get Started – Home after visiting macrium.com or the link in the description. Click "Download 30-day trial." Before clicking the download button, enter your email address. After looking for the download link in your inbox, download and launch the executable. Click "download" and leave everything in its default settings. You may already have the Macrium popup; if not, look for the Macrium folder in your downloads folder. Click the "home setup" button within. When the Macrium box appears, click next. Then, when the setup process appears, click Next once more, accept the terms, and click Next to begin the 30-day free trial. If you'd like, register first, proceed to the setup screen, and install. When everything is finished, click Finish. If Bitlocker has finished decrypting, restart your Ally. If not, wait for it to finish and then try again.
Connect your new SSD to the Ally and place it inside the enclosure. The process is quite simple: insert the drive into the slot and tighten it with the holding screw. There were also cooling pads on mine, which are safe to use. Let's make sure it appears after opening Disk Management. As I did, you'll probably see a prompt regarding initializing the disk; select GPT and click "OK." We're all set up; my disk is number one. I opened Macrium Reflect from the search menu, but you can also look for it in your program files. You can now view your drives here, and for my Ally, I see my old disk listed as Disk 1. However, the new drive is Disk 2. The size of the dividers will tell you. Click Clone this disk under the Ally 500 GB drive after selecting the Ally drive. Click disk two under "select a disk to clone to."
After selecting "Copy Partitions," you should select "Extend." Mine stretched the C drive automatically, but you can ensure the bar is fully extended to take up all of your space for that partition by clicking the C drive and selecting layout on the right. Click "Next" now. Next time, since we're not scheduling it. This page merely provides an overview of our work; click "Finish." It will then execute once you click "OK." Walk away from the computer now, don't touch it, and let it clone itself. Find your loved ones as usual and spend time with them because this will take some time.
Let's open the Ally now that our drive is ready to proceed. Of course, make sure the Ally is fully shut off. Just bear in mind that when we reassemble it, the bottom middle screw is shorter than the other six screws on the back. After unscrewing all six, we must remove the case. It's useful to start close to the triggers as I do, so use your credit card, spudger, or anything else to pry the cases apart.
After that, move it around until it comes off.
To be safe, some folks decide to unplug the batteries here. I won't do it myself, but you should be OK if you ground yourself before touching anything and avoid puncturing the battery. Unscrew the single screw securing the hard drive by lifting the black flap. Take it out and set it aside. Now, take your new hard drive and insert it, carefully line it in the same manner. Replace the screw. The casing effortlessly clicks together, so we can now replace it. Next, insert each of the six screws, keeping in mind that the center bottom screw is the shortest.
To be safe, power on your device and plug it in. We're finished; it works flawlessly, and the extra room is ready for use.
You ought to be in the same condition as before the Clone.
I hope you found this guide useful.
