Beacon Game Launcher Setup Guide

Beacon Game Launcher Setup Guide
What is Beacon Game Launcher?
For those unfamiliar with the name, Beacon Game Launcher is a front-end launcher for all your favourite old Android games. In other words, start your games directly from Beacon by telling it which directories your games are in and which emulators you have installed. Consider it similar to the UI when you turn on your Xbox, PS5, or Switch.
I want to draw your attention to one item, particularly if you're coming from a Linux handheld with EmulationStation and other programs. Any modifications we make to Beacon do not affect emulators or games because Beacon doesn't alter their settings. Beacon is merely a front with lovely graphics and simple navigation to access all your games; they are distinct instances. Let's move on.
Preparation
Before that, I suggest installing some games on your smartphone and emulators if you plan to follow along. You need those two things before beginning this instruction, but you can do that later if you'd like. See my Retro ROMs Beginner's Guide if you need help figuring out where to find ROMS to play.
Installation
Let's get started. First, look for Beacon Game Launcher by NERDS TAKE OVER in the Google Play Store.
When the download is complete, open it to see a large + sign to add a new platform. This implies that Beacon wants us to specify which platforms they want to display our games on.
To add a new platform, click the Plus icon.
- Platform type: If you wish to add Android games as a platform, this would be the emulator system, also known as Android.
- Player app: the real application that will be utilized with that system. For instance, if you selected Nintendo Game Boy Advance as your platform type, the Player app—typically RetroArch—would be the one you use to play GBA games.
- ROMs folder: where the folder containing your ROMs for the selected Platform is located. Point it to the folder containing your GBA ROMs in the example above.
Click Add Platform once you've decided on everything mentioned above. You may return at any time and add as many platforms as you wish, so don't worry.
Navigating Beacon
It would help if you were now on the main screen, most likely the NOW tab. You can switch between tabs using the L1/R1 joystick or touch.
You may access your Android apps screen by pressing the B button or choosing Apps from the bottom.
The Settings cog in the upper right corner of this screen also provides access to the Android settings menu.
Pressing Y from the main screen brings up the Beacon Settings.
Adding more Platforms
Using the same procedures we used for the installation, you may add extra Platforms by clicking the Plus icon in the lower right corner of Beacon Settings under Platforms.
Scraping
Sources can be turned on or off under Scraping in Beacon Settings. SteamGridDB.com and Screenscraper.fr require accounts from their websites, which you can add by clicking Add Account in Beacon.
Theme color, Background Style & Font
Under Preferences in Beacon Settings, you can adjust the theme to match your device's light or dark settings.
Emerald is the default theme colour, but you can alter it to any other colour to make the text the colour you like.
Waves are the default backdrop style. However, you can alter it to add other fascinating backgrounds.
If you scroll down, you'll find many more options, including the ability to modify the font.
Gallery, List & Grid View
From the main screen, you can switch between Gallery, List, and Grid views by touching the cards at the bottom next to Settings.
Setting as the home app
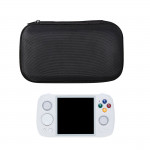
If you installed Beacon on a gaming portable like me, you would like it to launch directly into Beacon at startup and return to Beacon after using any apps or games. This will vary for every Android device, but you want to go to Apps, Applications, or something similar. Go to Apps (B); the Settings cog is at the top right. You should see something similar to Default Apps there, and if you navigate to the Home app, you should see it. Clicking that will allow you to switch to Beacon as your home app and finish the process.


