How to Install GammaOS Core

How to Install GammaOS Core
Early in September, Gamma released the beta version of GammaOS Core. This version brings Android to devices that could previously only run Linux by supporting a range of low-powered consoles.
Introduction
Early in September, Gamma released the beta version of GammaOS Core. This version brings Android to devices that could previously only run Linux by supporting a range of low-powered consoles.
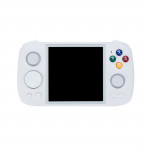
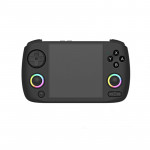
Many Anbernic and Powkiddy devices can now take advantage of those capabilities thanks to GammaOS:
- Powkiddy RGB30
- Powkiddy RGB20SX
- Powkiddy RGB10Max 3
- Anbernic RG503
- Anbernic RG353M
- Anbernic RG Arc-D
- Anbernic RG Arc-S
- Anbernic RG353V
- Anbernic RG353VS
- Anbernic RG353P
- Anbernic RG353PS
Derek's video is available on the Retro Handhelds YouTube channel if you would rather watch a video tutorial and quickly review the features.
What You'll Need
- One of the devices mentioned above
- Windows PC
- 7-Zip
- GammaOS Core
- available on Gamma's Github
- Rockchip SD Disk Tool
- 32GB or higher MicroSD card
We still advise 32GB or more because GammaOS functions best with SD cards more significantly than 32GB; however, I've also had luck with a range of 16GB cards.
The device name appears in the title of every download on the GammaOS Github. Naturally, if I were using an RGB30, I would require the "GammaOS_Core_Beta1_RGB30_RGB20SX.7z" file. Only download the one that is compatible with your device. Since GammaOS was created especially for these devices, using another one will not function as well as it should.
GammaOS Core Install Guide
It should be mentioned that installing GammaOS Core in beta form may have more bugs than when the official release is released. Anyone wishing to install Core on one of the devices above may find this instruction helpful, even though the procedure should be the same, and the download names may alter slightly.
Step 1: Set Up
Before proceeding, make sure you are downloading the correct 7-zip file for your machine. The first option on the list, 64-bit, will be used by the majority of users. If you're not sure, you can verify in the Settings app by selecting About at the bottom. An ARM-based computer requires the arm64 version, x32 requires the 32-bit version, and x64 requires the 64-bit version.
Double-click the.exe after it has finished downloading, then follow the installation instructions.
After downloading both, you will get a.7z file for GammaOS Core and a.zip file for the Rockchip SD Disk Tool. Double-clicking each of them separately should cause 7-Zip to launch a window with the entire contents of the.7z file shown. The SD Disk Tool' s.zip file should open like the Windows Explorer screenshot below, albeit it might contain files similar to those in the folder with the same name.
The.7z file should contain one .img file, and the .zip file should contain eight files, including one .exe file.
After double-clicking the GammaOS.7z file, it launched 7-zip. Select Extract from the menu in the top left corner, as indicated below. Then click OK on the next screen. By doing this, the.img file will be stored in a folder with the same name as the.7z file.
After double-clicking, the Disk Tool.zip file should open and resemble the screenshot below. If you have configured 7-zip to support zip files, the screen will look like the one above. If not, it doesn't matter, so don't worry. Use the same extraction procedures as for the aforementioned.7z file.
In the choices ribbon, select Extract All. Then, on the next screen, select Extract. The Disk Tool and its seven files will be placed in a folder with the same name as the zip file.
Step 2: Create the GammaOS Core Card
WARNING: Gamma officially advises using the SD Disk Tool you downloaded above. Nonetheless, there have been tales of successful Rufus users.
Double-click the SD_Firmware_Tool application after opening the folder containing the Disk Tool. A notification stating that "Windows has protected your PC" might appear, but we'll disregard it. Click "More information," and then "Run" nevertheless. After this, select Yes if a prompt appears with a yellow banner at the top.
You should choose your MicroSD card from the dropdown menu for the first choice, which reads "Choose removable disk." Select the option with the specified storage size if it displays two alternatives with the same name.
The second choice is to Select the function mode. Make sure the SD Boot is checked.
Select firmware as the third choice. Then, locate the.img file, which should be in the GammaOS folder you created when you extracted the .7z file.
At last, press the Create button. The image will be flashed on your SD card through this technique, although not in the typical way. It shouldn't take too long, but it might take a few minutes. It took roughly ten minutes on an old Intel i5 Mac mini running Windows on a 16GB card. It takes several hours for a 400GB card.
As soon as you see the message "Creating upgrade disk ok," you'll know it's finished.
Step 3: Install GammaOS Core
Now that your SD card has been flashed, you're off to the races. Remove the SD card from your computer and insert it into the TF1 port on your device or the single SD card slot if your device only has one SD card.
The installation will start as soon as you turn on your device. Four Linux penguins are among the first things you'll notice, followed by a blank screen. The installation can take a while, but the Android setup screen and the GammaOS logo should subsequently appear.
Step 4: Post-Install
Installing GammaOS Core is preconfigured for the device for which it was designed. That is, the app settings, the places they search for games, everything. Daijisho or PlainLauncher are included, although I've only had reasonable results with the former.
If Daijisho can't locate your games, select the console that is giving you trouble and press the Paths button at the bottom. On the next screen, click Add More. From here, go through the file manager until you locate the folder containing every game on that system. After entering the folder, select Allow after tapping the blue Use This Folder button at the bottom. If Allow Access appears in your file manager instead of Use This Folder, tap it and follow the exact instructions.
After you've done that, the folder path should appear in the center of your screen. Press Sync. This will start the process of adding the games to your collection automatically.
RetroArch is preinstalled on GammaOS, and Daijisho will use it by default. You can modify the cores being used by accessing a particular console and navigating to its settings from within Daijishjo. In addition to the fact that GammaOS Core is still in development, Android isn't officially meant to function on a device with this low computing power. It will take a lot of testing from different community members to determine how well a game will function with a particular core under these circumstances.
You may use the inbuilt Aurora Store to download apps or, if you prefer, utilize other emulators. It's a substitute for the Google Play Store that lets you download apps anonymously (no account is required).
You may often see the Google Play Store on your phone, but it's not what it looks like.
An alternative is to download APK files to your computer, switch off and remove your device's SD card, insert it into the computer, and then move the.apk to a special place. Replace the card, launch the File Manager, locate the.apk, and open them to install it.
Press the Settings icon that appears, then adjust the Allow from this source slider to on if you receive a warning that you cannot install apps from this source. Android will then ask if you want to install it; click "Yes."
Wrap-Up
One of my favorite retro handheld projects is GammaOS. Software developers and modders have been installing Doom on various devices for the past three or four decades, including microwaves, refrigerators, electronic pregnancy tests, and more. The fact that the same attitude still exists now, albeit in far more useful forms, is encouraging.
For some folks, installing Android can alter everything. While some people like that it uses a comparable operating system to their phones, others don't. Fortunately, consumers now have the option because of Gamma's ongoing development and support.
