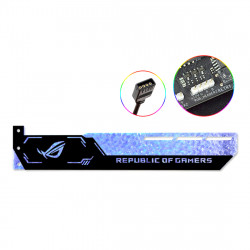
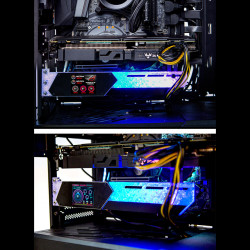
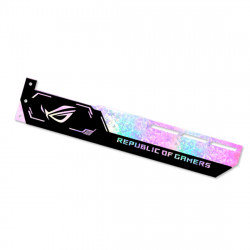
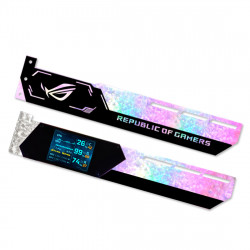
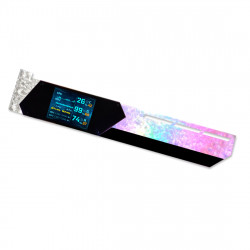
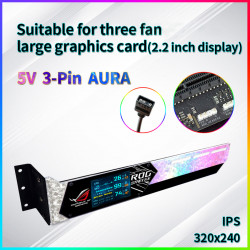
GPU Support Bracket
Horizontal and vertical GPU mounting offer distinct aesthetics and functionality for your gaming setup, each with advantages and considerations.
Horizontal GPU Mounting: The Classic Approach
Horizontal mounting is the traditional method where the GPU is installed parallel to the motherboard, with the front of the graphics card facing downwards. This setup is straightforward, effective, and has been the standard for years. It may not provide the visual flair some gamers seek, but it's reliable and ensures adequate airflow in most cases, preventing overheating issues.
Vertical GPU Mounting: Showcasing Style
Vertical GPU mounting, on the other hand, turns the graphics card to face the side panel of the PC case, allowing for a full display of the GPU, especially appealing if it features distinctive designs or RGB lighting. This method enhances the visual appeal of your setup, making it a popular choice for gamers who take pride in their rig's aesthetics and have a case with a transparent side panel.
Considerations for Vertical Mounting
While vertical mounting can elevate the look of your PC, it's essential to consider potential drawbacks. Depending on the case design, a vertically mounted GPU might sit too close to the side panel, restricting airflow and potentially leading to higher operating temperatures. Additionally, this configuration might not be compatible with all cases or require a specialized bracket.
Vertical mounts are particularly suited for custom liquid-cooled setups, where the cooling system mitigates traditional airflow concerns. The aesthetic benefits can be enjoyed in these scenarios without compromising the GPU's performance.
Choosing the Right Mounting for Your GPU
Deciding between horizontal and vertical mounting comes from personal preference, case compatibility, and cooling considerations. If showcasing your GPU's design and lighting is a priority and you have the proper case, vertical mounting can be a striking choice. However, horizontal mounting remains a reliable and effective option for those prioritizing simplicity and airflow without the need for additional brackets.
Whether you choose horizontal or vertical mounting, ensuring your GPU operates within safe temperatures, and your setup meets your aesthetic and performance expectations is critical.
Mounting your graphics card horizontally or vertically offers unique benefits tailored to different priorities, from airflow and longevity to aesthetics and showcasing high-end components.
Benefits of Horizontal GPU Mounting:
- Improved Airflow: Horizontal mounting positions the GPU to promote better airflow around the card, reducing the risk of overheating. This setup prevents the GPU from being too close to the case's side panel, allowing the fans to operate more efficiently.
- Enhanced Performance and Lifespan: Thanks to the superior airflow, GPUs mounted horizontally often perform better, especially under heavy loads or when overclocked. This can also contribute to a longer lifespan of the GPU due to reduced thermal stress.
- Simplicity and Compatibility: Horizontal mounting doesn't require additional accessories like a vertical mounting bracket or riser cable, making it a straightforward and universally compatible option. It's a plug-and-play solution that works seamlessly with most PC cases and motherboards.
- Optimal Thermal Management: With fans facing downwards, horizontal mounting facilitates more effective air intake and exhaust, helping to maintain optimal operating temperatures and potentially enhancing overall system thermal performance.
Benefits of Vertical GPU Mounting:
- Aesthetics and Display: Vertical mounting showcases the GPU, especially models with elaborate designs, RGB lighting, and custom cooling solutions. It turns the graphics card into a centerpiece of your PC build, ideal for cases with transparent side panels.
- Prevents GPU Sag: Heavy GPUs can sag when mounted horizontally over time, potentially straining the PCIe slot. Vertical mounting eliminates this issue by supporting the upright GPU, reducing the motherboard's stress.
- Ideal for Custom Builds: For enthusiasts who invest in water-cooled systems or desire a visually striking setup, vertical mounting highlights custom cooling loops and RGB effects to their fullest. It's particularly appealing in custom and high-end builds where visual impact is as significant as performance.
- Maximizes the Potential of RGB Lighting: Vertical mounting is perfect for displaying the full splendor of RGB lighting on GPUs, allowing for a more immersive and customizable aesthetic experience within your PC build.
Choosing between horizontal and vertical GPU mounting depends on your needs and priorities. If airflow, thermal performance, and simplicity are your main concerns, horizontal mounting is likely the best choice. However, if aesthetics, showcasing your GPU, and preventing GPU sag is more critical, vertical mounting offers a compelling alternative, especially for custom and visually focused builds.
Installing your graphics card through horizontal or vertical mounting is a pivotal step in setting up or upgrading your gaming PC. Here's a step-by-step guide to help you through both processes:
Horizontal GPU Mounting Installation
- Prepare the PCIe Slot: Remove the necessary PCIe backplates from your case to make room for the GPU. Determine how many slots your graphics card will occupy and remove the corresponding backplates.
- Install the GPU: Align the graphics card with the PCIe slot at a slight angle to ensure the I/O ports fit through the backplate opening. Before inserting, make sure the PCIe slot clip is open. Press the card into the slot until you hear a click, indicating it's securely connected.
- Secure the GPU: Use screws to fasten the GPU's metal bracket to the case, ensuring it's held firmly in place. Be careful not to force the card excessively to avoid damage.
- Connect Power Cables: Attach the power connectors to your GPU. This could be one or two cables with 6 or 8 pins. Using the correct type of power cable is crucial to prevent damaging your components. A proper connection will usually click into place.
- Test the Installation: Before reassembling your entire PC, verify everything is installed correctly. Connect your monitor and power supply, and turn on the PC to check for a display output. If you see an image on your monitor, your GPU is correctly installed.
Vertical GPU Mounting Installation
- Assemble the Mounting Bracket: If your case supports vertical GPU installation, start by connecting the vertical mount's bottom and side brackets using the provided screws.
- Attach the PCIe Riser Cable: Secure the PCIe riser cable to the bottom bracket with screws. If you don't have a riser cable, you'll need to purchase one, such as the Gigabyte PCI-E 3.0 x16 Riser Cable, which is suitable for this purpose.
- Install the Graphics Card: Mount your GPU onto the riser slot and secure it to the bracket with screws, ensuring it's firmly in place.
- Install the Bracket in Your Case: If your case doesn't have a built-in vertical GPU mount, you may need to buy a vertical GPU mounting kit. Ensure your case is compatible with the kit. Secure the bracket to your case using the provided screws, then connect the riser cable to the motherboard's PCIe slot.
- Final Checks: After securing the bracket and making all necessary connections, reassemble your case and connect your PC to power and a display. Turn on your PC to ensure the GPU functions correctly, as the display output indicates.
Both installation methods have their merits. Horizontal mounting is straightforward and often provides better airflow, while vertical mounting showcases your GPU's aesthetics, which is especially useful for builds where visual appeal is a priority. Whichever method you choose, following these steps will ensure a successful installation.


